Chocolate Cream Filled Cupcakes
It's me again! With all the packing then unpacking, moving and cooking for the holidays I barely had time to sleep never mind blog. This week has been drastically different. All of the essentials for my apartment have been bought (or at least until I remember what I'm missing... again), groceries are done and everything is unpacked and in place. On top of that M has exams this week, so I've spent the week being super quiet in order not to disturb any studying and besides job hunting have been pouring over all of my favorite baking blogs and Pinterest! It's a tough life ;)
This year hasn't been the easiest. M's put a lot on the line with school to make sure he was there throughout my grandmother's entire illness, whether it meant rescheduling or missing exams and deadlines or taking time from studying to support my whole family. He's a pretty spectacular person. So I wanted to do something special for him with his last exam happening today! So after searching through my go to baking blog queens and Pinterest I discovered the perfect treat!...
M absolutely loves Hostess cupcakes. Whether it's at a convenience store, spotted while grocery shopping or a stop on one of our crazy adventures the distinctive cupcake with its twirls (or sprinkles or icing...) always seems to draw him in. For dinner I made a sloppy joe type sandwich on fresh Challah bread I had baked - a special request I was super happy to fulfill since it entailed very little work and time and left me with more than enough opportunity to work on these cupcakes.
My usual prerequisites for any recipe involve them being quick, no mess and no fuss. This was NOT even close to being any of those. It involved four steps, three bowls, a sauce pan, piping bag and so much more! For M it was worth the exception to my rule!
I looked up a bunch of cream filled recipes but either didn't have the ingredients required by all of them (or the patience...). So in the end I merged three recipes! You have to try this recipe, yes YOU! It makes you feel like you're some awesome baker, worthy of having a blog and showing off your baked goods (even if the twirls are a little... off). It was super hard to keep quiet while M was working on an online exam, when all I wanted to do was celebrate every mini cupcake!
Below I've included the entire recipe that I used; each of the steps, as well as links back to the original sources. It wouldn't be an Itsy Bitsy Balebusta recipe if it didn't include a hint of generations past, and somehow my grandmothers and mother's recipes always play into what I'm working on. It turned out that I didn't have all of the ingredients necessary for the ganache portion of the recipe so I opted to use Avo Lina's chocolate icing from her coconut cake (one of my first posts!). Once again, one of the epic ladies in my family to the rescue!
Good luck, be patient, have fun and as always enjoy!!
Chocolate Cream Filled Cupcakes (36 mini cupcakes)
As per the absolutely awesome Can't Stop Baking blog I used Hershey's recipe for "Hershey's Perfectly Chocolate Cake"
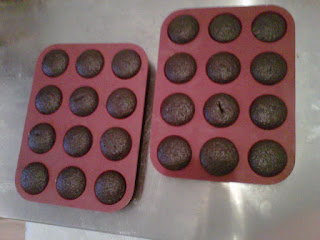
I baked this recipe as mini cupcakes (originally I bought the cupcake pan and everything to make full sized cupcakes, but forgot to buy the liners. Yup. Luckily I had the mini cupcake liners at home and made a quick change). I filled each one 2/3 full (one tablespoon worth of batter) and baked them at 350 degrees F for 16 minutes.

For the Cream I used a variation of Can't Stop Baking's Filling
4 1/2 tablespoons margarine
1/4 cup shortening
2 cups confectioner's sugar
1 pinch of salt
3 tablespoons soy milk
1 teaspoon vanilla extract


This year hasn't been the easiest. M's put a lot on the line with school to make sure he was there throughout my grandmother's entire illness, whether it meant rescheduling or missing exams and deadlines or taking time from studying to support my whole family. He's a pretty spectacular person. So I wanted to do something special for him with his last exam happening today! So after searching through my go to baking blog queens and Pinterest I discovered the perfect treat!...
M absolutely loves Hostess cupcakes. Whether it's at a convenience store, spotted while grocery shopping or a stop on one of our crazy adventures the distinctive cupcake with its twirls (or sprinkles or icing...) always seems to draw him in. For dinner I made a sloppy joe type sandwich on fresh Challah bread I had baked - a special request I was super happy to fulfill since it entailed very little work and time and left me with more than enough opportunity to work on these cupcakes.
My usual prerequisites for any recipe involve them being quick, no mess and no fuss. This was NOT even close to being any of those. It involved four steps, three bowls, a sauce pan, piping bag and so much more! For M it was worth the exception to my rule!
I looked up a bunch of cream filled recipes but either didn't have the ingredients required by all of them (or the patience...). So in the end I merged three recipes! You have to try this recipe, yes YOU! It makes you feel like you're some awesome baker, worthy of having a blog and showing off your baked goods (even if the twirls are a little... off). It was super hard to keep quiet while M was working on an online exam, when all I wanted to do was celebrate every mini cupcake!
Below I've included the entire recipe that I used; each of the steps, as well as links back to the original sources. It wouldn't be an Itsy Bitsy Balebusta recipe if it didn't include a hint of generations past, and somehow my grandmothers and mother's recipes always play into what I'm working on. It turned out that I didn't have all of the ingredients necessary for the ganache portion of the recipe so I opted to use Avo Lina's chocolate icing from her coconut cake (one of my first posts!). Once again, one of the epic ladies in my family to the rescue!
Good luck, be patient, have fun and as always enjoy!!
Chocolate Cream Filled Cupcakes (36 mini cupcakes)
As per the absolutely awesome Can't Stop Baking blog I used Hershey's recipe for "Hershey's Perfectly Chocolate Cake"
I baked this recipe as mini cupcakes (originally I bought the cupcake pan and everything to make full sized cupcakes, but forgot to buy the liners. Yup. Luckily I had the mini cupcake liners at home and made a quick change). I filled each one 2/3 full (one tablespoon worth of batter) and baked them at 350 degrees F for 16 minutes.


For the Cream I used a variation of Can't Stop Baking's Filling
4 1/2 tablespoons margarine
1/4 cup shortening
2 cups confectioner's sugar
1 pinch of salt
3 tablespoons soy milk
1 teaspoon vanilla extract
Place all of the ingredients in a mixer and using the whisk attachment, beat for 5 minutes on high speed. I stopped every few minutes to check the consistency (and to cheat and have a little taste y'know to make sure it was working out well...). You can find another amazing recipe for filling at the blog What Megan's Making, where I got the inspiration to try this recipe out! I initially was going to make this filling but didn't have the necessary ingredients when it came time to get baking. I was super happy with what I opted for in the end, but would still love to try out Megan's filling at some point when I'm ready for another marathon recipe. Once it was the correct consistency and the cupcakes had, had twenty minutes to cool, I used a spatula and put the cream into a piping bag! Using a small star tip, I made a hole in the center of each cupcake and twisting the top of the bag with my right hand and applying pressure with my left hand, I piped cream into the cupcake counting to five slowly until it started to come out of the top and the cupcake had puffed out. It was a lot easier than I was expecting and not messy at all! It made me feel like a legit food blogger! Try it.


Finally for the chocolate ganache/icing I used my grandmother, Avo Lina's chocolate frosting recipe
1 cup of sugar
3-4 tbspns soy milk
3 tbspns cocoa
1-2 tsp butter
3-4 tbspns soy milk
3 tbspns cocoa
1-2 tsp butter
(I also added a handful of chocolate chips to add some texture and make it a bit more chocolate-y)
I placed all of the ingredients in a saucepan on medium heat for 3 minutes constantly stirring
Allow it to sit for a minute once you remove it from the stove to cool down. You don't want the hot frosting on the cupcakes, it will get runny and mess with your cream filling and create a huge mess in general. The extra time spent holding back will pay off in the end! Just be careful not to wait too long, the icing starts to harden and when you mix it there are weird clumps from the hardened layer mixed in so keep an eye on it.
I started by dipping the cupcakes into the frosting but progressed to using a teaspoon measuring spoon to pour frosting overtop then using the back of the spoon to smooth it out.
*Update 06/21/12 I made these again yesterday, and tried out a different chocolate ganache. I used a variation of the wonderful Annie's Eats, ganache that she used on her Fauxstess Cupcakes:
1/2 cup nutriwhip (pareve dessert topping)
5 tbsp chocolate chips (you can add more or less, depending on how chocolate-y and creamy you'd like it! Since nutriwhip has an already sweet creamy taste, I put a little less chocolate than called for - apparently there's a first time for everything!)
Finally I took the remaining cream in the piping bag and slowly piped the twirls onto the cupcake. (Straight line, loop, line, loop, line). A few proved difficult but after the tenth I started to get the hang of it!

These take quite a bit of work but the result is totally worth it. Really for M anything's worth it and after he had a couple and was still smiling and super impressed I felt like I had hit the jackpot!
Hope you enjoy making them and showing them off! And to M, I'm SO proud of you!! You're awesome!! Here's to many more successes, celebrations & cupcakes! :)


Comments
Post a Comment